
The cabinotch® Full Access “Blind Corner” Cabinet
I’ll start this post with a quick update, we are actually going to produce and ship Cabinotch Full Access Job #1 this coming week (the first week of February 2017), along with Job #2, Job #3 and possibly Job #4. If there is no cake and ice cream in Owensboro Kentucky this coming week, I am going to be one sad guy.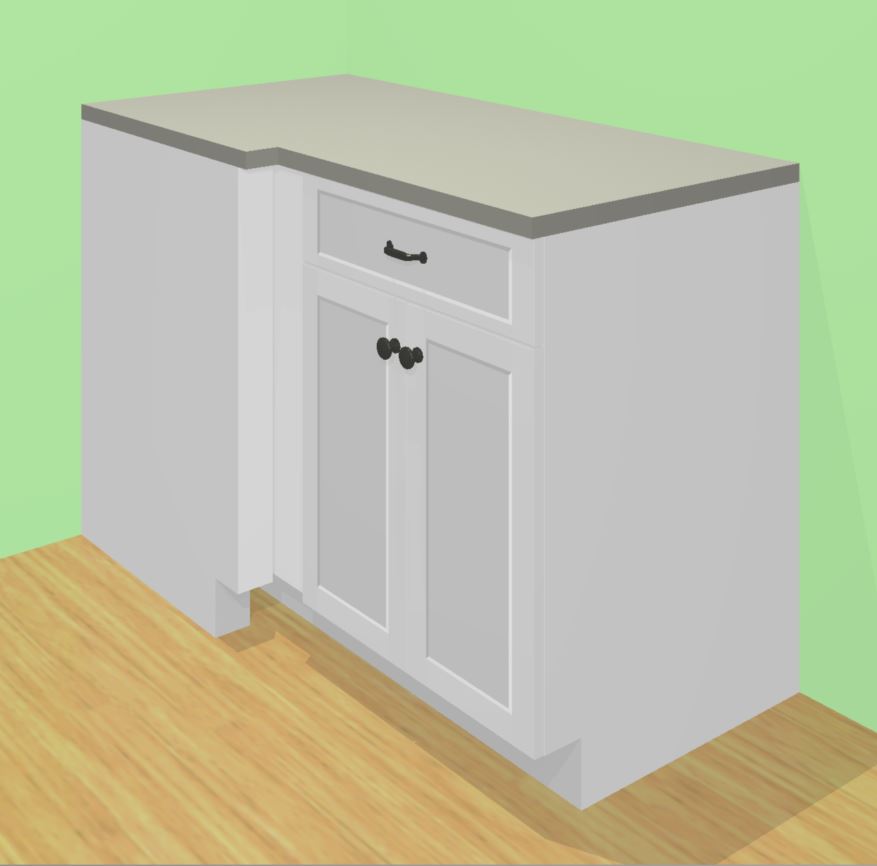
The next obvious question becomes, whose going to order Job #5? You know you want some of our Formaldehyde Free, Gluten Free, Sugar Free, Fat Free and Calorie Free Full Access Cabinetry, so belly up to the WebStore and place your order (oops, that part ain’t working yet, but stay tuned, we’ll have it all working soon).
This blog post is going to be all about a foundational cabinet, the Blind Corner Cabinet (most Kitchen Designers start in the corner, and work their way out from there). Most kitchens have some sort of corner cabinet like this one, or a Pie-cut Corner Cabinet, or a Diagonal Corner Cabinet (we have them all in the Cabinotch Full Access Library). To kill the corner altogether is blasphemous to most Kitchen Designers (at least the good ones anyway), so the creative juices usually start in the corner.
So if you have three choices (there are a few other much less frequently used options, and typically impractical from a budgeting standpoint, so these three are the choices for most Kitchen projects), how do you decide which one to use? Since we are looking at the Blind Corner Cabinet, let’s look at its virtues and we will talk about the others strengths and weaknesses when we get to those cabinets in future blog posts. One of the clear advantages of the Blind cabinet is you can keep your top drawer on the blind cabinet wall, and you could have any cabinet type you prefer on the return wall, even a 3 or 4 drawer stack. With a Diagonal or Pie-cut Corner Cabinet, you lose at lease 9″ of top drawer space on each of the two walls that make up the corner.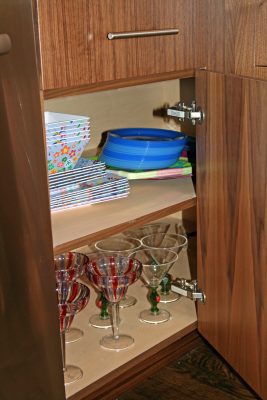
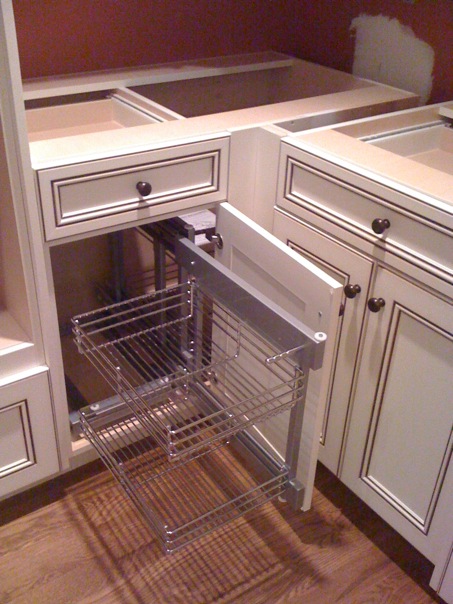
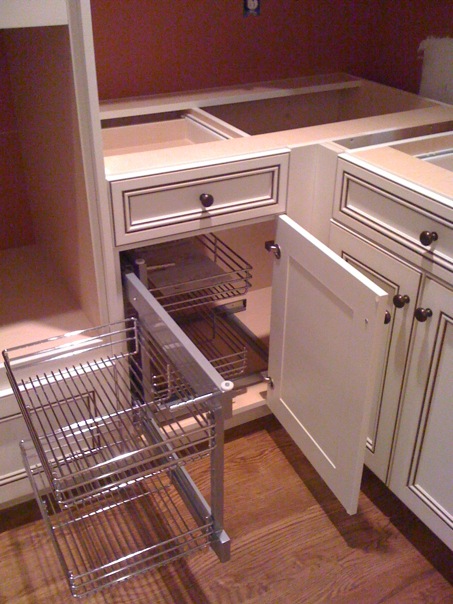
Inside this cabinet you could have something as simple as an adjustable shelf (your least expensive option), which in some cases is a very practical solution as you get to utilize every square inch (it’s just a little hard to get at). All your other options, while more expensive, and in many cases substantially more expensive are going to waste some of the storage space of this cabinet. One of my favorites is the segmented pull-out, which only wastes a little space at the blind end of the blind cabinet.

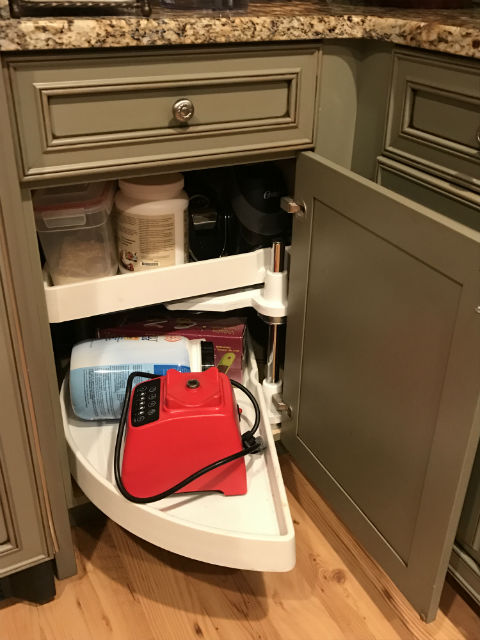
Another option is to use a 1/2 Moon Susan. There are many brands and configurations, but almost all are as the name implies, shaped like a half moon. These are popular because they are typically one of the lower cost options, and yet are very effective at bringing the items you store on the 1/2 moon shelves around, and in the case of the sliding units, out to you (the shelves are mounting on a pivoting unit that includes drawer type guides, allowing the shelf to pivot around 90 degrees, then pull out of the cabinet to make accessing the items on the shelves much easier).
Some designers, and homeowners are not real fond of the fact that there is a wasted triangular space at both back corners of the cabinet, but will still accept this solution purely on it’s value.

So now let’s talk a little bit about how we make this cabinet at Cabinotch. Our first consideration is to make every cabinet we engineer as quick and easy as possible to assemble, which is why we chose the Lamello Tenso P14 fastener (I’ll spend an entire blog post talking about nothing but this fastener soon). By using this 2-piece fastener, we achieve several objectives. One is that it allows you the option of integral finished ends (to put my cards on the table here and now, I am a huge fan of using applied ends in all cases, even if the end is a slab end, of which I will speak to at length in a future blog post).
But integral finished ends are just one of many attributes that make this fastener desirable. Speed of assembly is always a consideration, and the Tenso P-14 is as fast as any method out there, and yet provides a strong joint. BUT, our favorite part of using any fastener in this category is locating internal parts (it’s easy to align the sides with the tops and bottoms if you are using a simple staple and screw methodology, but all those internal parts, especially in cabinets like the Blind Corner Cabinet can be very challenging to locate and attach in the absence of some sort of marking or fastener.
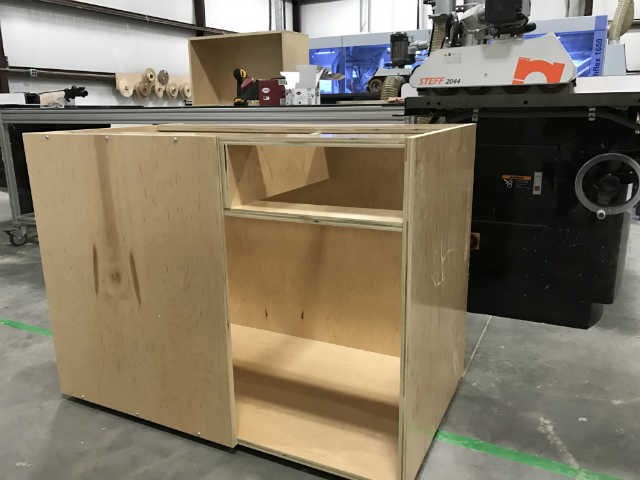
The toughest part to locate and attach on a Blind Corner Cabinet is the drawer partition. To solve this we machine the top and bottom of the partition for Lamello fasteners, and then the bottom of both top rails, and the top of the mid rail for the Lamello fastener, making locating and assembling the assembly about as fast and easy as any method I am familiar with. SNAP, SNAP, SNAP and your partition assembly is ready to snap to one of the side panels. The partition itself is through-bored for drawer guides, so between it having two Lamello’s on the top, and only one Lamello on the bottom, and the 5mm drawer guide holes being through-bored, you simply cannot assemble it incorrectly. 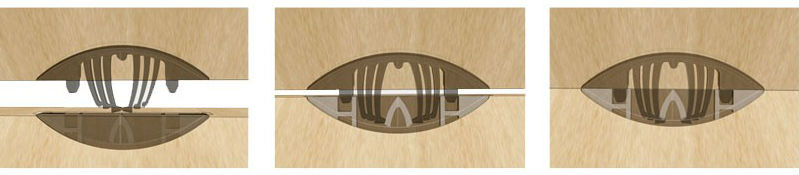
The next part that is unique to this cabinet is what is commonly referred to as the Blind Panel. This part needs to be finished like the interior of the cabinet on one side (in our case, UV coated), and of the same veneer specie that you are using on the exterior of the cabinets on the exterior. Then it need to be machined for hinge plates in most cases (like the cabinets shown in the images above), we have chosen to machine for only one brand of hinge to keep this cabinet and this Library as simple as possible, so the hinge plate boring is specific to a Blum blind corner hinge. This Blind Panel also needs to be machined in some way to allow you to attach the blind panel to the face of the Blind Corner Cabinet. As you can see in all the images above, we have it sized so it reveals 76mm (3″) of the blind panel after you add the Blind Return Filler to the opposite wall. I typically attache the Blind Return Filler to the Blind Panel when installing this cabinet, this makes for a good tight joint, even if something moves in the future.
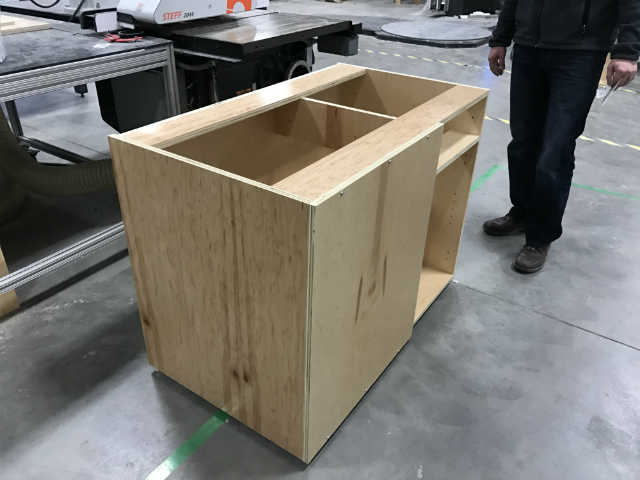
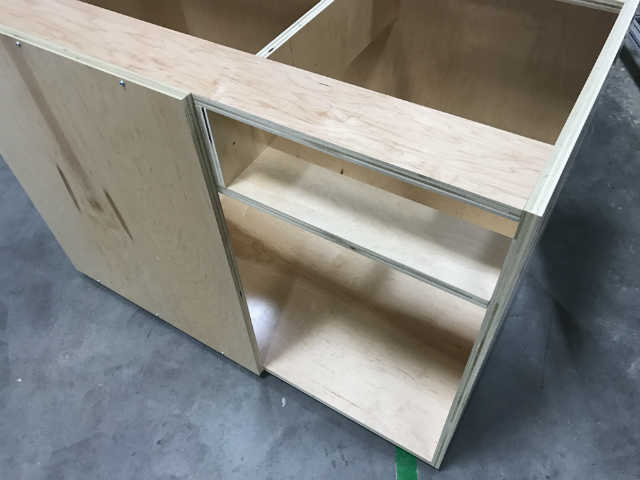
We have chosen to machine the blind panel with a series of 3mm pilot holes, making sure that we stay back 4″ from the business edge (the part you see) so you can simply attach it with screws. Normally we through-bore pilot holes, but in this case, we just get real close so just in case your cabinet heights change in the corner, which might expose some portion of the top section of the Blind Panel, you can use an alternative blind method to attach (i.e., angle brackets, pocket screws, etc.).
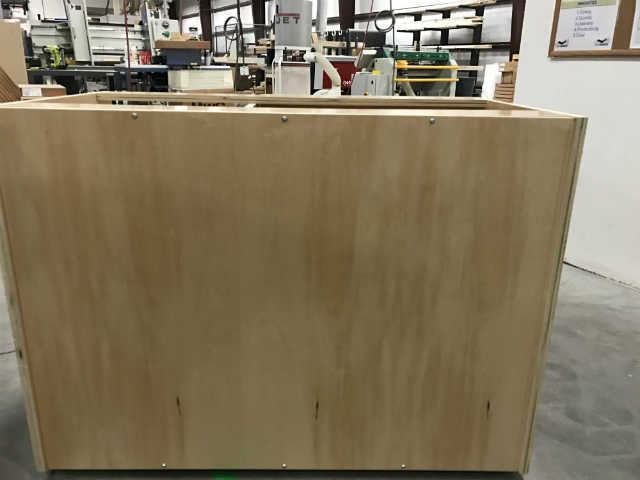
As with the Oven Cabinet in my last post, I apologize for how ugly this cabinet is (it’s still a beautiful thing to me), but this was Blind Cabinet #1, the prototype for all future Blind Corner Cabinets, so we did not edgeband it, nor did we actually machine the Blind Panel from the appropriate material (1 side UV, 1 side veneer), we just machined the Blind Panel with all the other parts that were UV 2 sides.
 One last assembly feature I want to point out is that the back is bored with multiple 3mm pilot holes at the top and bottom. This allows you to screw through the 3/4″ thick back into the 3/4″ thick bottom and the 3/4″ thick top rail to make sure the back does not deflect when you screw the cabinet to the wall, and to lock the cabinet into a square state at assembly.
Well that pretty well covers our super cool Blind Corner cabinet, but feel free to ask any questions you might have below, and to make sure you won’t miss any of our Cabinotch posts, enter your email address in the Subscribe field on the right, and each time we add to this discussion, you will automatically be notified. Oh, and you won’t hurt our feelings if, depending on where you are seeing this, you Share, Like, Plus or Re-tweet it.