Sorting Your cabinotch® Component Parts
On Thursday of this past week, I got the opportunity to visit a job-site where we would be assembling and then installing a bunch of cabinotch® full access cabinets. My objective was to help the installation crew to understand the proper assembly of cabinotch® full access cabinets, and then how the Suspension System for wall cabinets, and Leg Levelers for base cabinets worked, although my real objective is to help cabinetmakers make more money now and in the future.
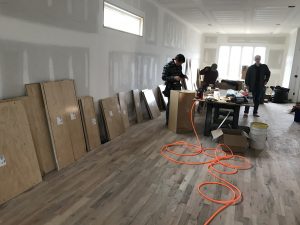
When Chuck Norris, I mean Stuart Norris (our salesman for this territory) and I arrived at the job-site, they already had all the cabinet components spread out against the walls of the unit, separated by cabinet number, which was ideal for Chuck, I mean Stuart and I (unload and sort is not always the fun part of cabinet assembly or installation). Since this was the second time I have had the opportunity to see the results of this sorting of the parts, and I have done something very similar in my own plant years ago, I have a few thoughts that might help others with this process.
In the case of job #1, the parts were not sorted when we arrived, just stacked on a work bench. So our first objective of the morning became, sorting them by cabinet number. With multiple people doing this, it became a bit of a shouting match of who had what part, or where was the stack for this cabinet number or that cabinet number. In the end, once we started the assembly process, we still struggled with finding the right stack of parts, and with there being multiple stacks for a single cabinet (two people started a stack in different locations). There was even a point in time that everyone was convinced we were missing a part (we were not, it was just in the wrong stack).
On this second site, with the sorting being done when we arrived, we were in a better place to start with, but even with them already sorted, we still had a few parts in the wrong stack, and several cabinets had parts in more than one stack. This got me to thinking that we needed to attempt to provide some instructions for this process. I’m not going to claim that these instructions are the very best way to do this since they are only based off my personal experience in my own plant years ago, and a couple job-site experiences, so with more time and experience, you will probably find better ways to do this than I am about to present. But, maybe this will serve as a good starting place to remove a little bit of chaos from the process, although I would ask you to consider this quote as you begin the process of inventing your own automated solution.
“Automation applied to an inefficient operation will magnify the inefficiency”. -Bill Gates
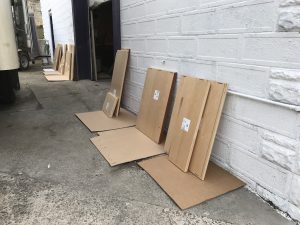
One quick comment I want to get on the table right up front. Leaning solid wood or plywood parts against a wall, with the parts resting on a concrete floor is a recipe for disaster. Concrete is like a moister sponge, pulling moister from the substrate below and wicking that moister up into your parts. If a concrete floor is involved, and you can’t afford or justify the expense or space for the parts carts I’m going to recommend in a few minutes, at least put down a board, plastic, cardboard, or something for your parts to rest on to keep moister from wicking up into your cabinet parts (stepping down off my soap box).
Now, back to the business at hand. If you are having your cabinet components delivered directly to the job-site, then parts carts may not be a good solution for you. But we can make this process a whole lot better with just a little bit of planning. ALWAYS print your job drawings and provide them to your installers. This provides them with the room layout and the cabinet numbers. The first thing I would do would be to take a pencil (never, never use a Sharpie or ink pen on sheet-rock, the painters will curse you with some voodoo you don’t need in your life) and mark an area for each cabinet in an ascending or descending order on the wall (assuming this is new construction, and the walls are not yet painted). This will make it a lot easier to get all the parts for a single cabinet in the same place, and will make it a lot easier to find the parts when you are ready to assemble that particular cabinet. For a remodel, I would mark a piece of blue painters tape with each cabinet number, and put that on the wall.
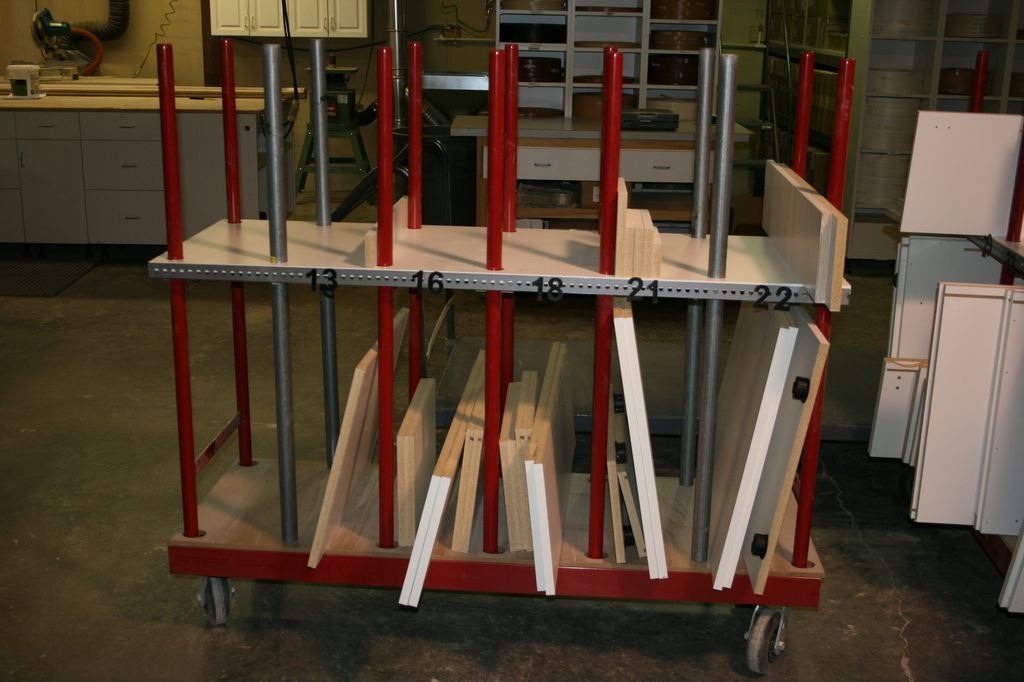
In the case where the components are delivered to your shop/plant, I would highly recommend some parts carts. I like the ones sold by Hafele, but I prefer to modify them to make them even better for sorting and storing parts. Storing parts vertically is ideal since it lets you get a lot of parts in a small amount of space, and also allows you to get at any of the parts without having to move other parts first (I’m not a fan of carts that require you to stack parts horizontally, which make you have to dig for the part you need). The modifications I like to make to these parts carts are to add two more sections so I have 6 divided sections, then add a shelf to one of the lateral supports, making it easy to put base cabinet parts for up to 6 cabinets on the bottom shelf, and wall cabinet parts for up to 6 cabinets on the upper shelf. I then like to add rubber feet to all or at least a few of the vertical poles so I can lay tall parts on top of the cart horizontally.
My last modification would be to add a metal band to the edge of the shelf I added, which provides a place for me to place magnetic numbers on the parts cart, identifying the cabinet number for that section, which also makes it easier to find the parts later when I’m ready to start assembling cabinets.
Well, I hope that helps a few cabinetmakers as they unpack their cabinotch® full access cabinetry components for their first of many cabinotch® full access projects. We look forward to serving your component needs, and hope you learn to love this solution as much as we do.
One last thing, in anticipation of two upcoming blog posts (assembly and installation), I thought it appropriate to post a link to our written cabinotch® Full Access Installation Instructions.
Well that pretty well covers this topic, but feel free to ask any questions you might have below, and to make sure you won’t miss any of our cabinotch® posts, enter your email address in the Subscribe field on the right, and each time we add to this discussion, you will automatically be notified. Oh, and you won’t hurt our feelings if, depending on where you are seeing this, you Share, Like, Plus or Re-tweet it.
