
The cabinotch® Full Access “OVEN” Cabinet
So our full (National) launch of the cabinotch® Full Access line of cabinetry is fast approaching, and I want to take a few minutes to talk about one of the really cool cabinets we have added to the cabinotch® Full Access Library, the Oven Cabinet.
One of the hardest things about residential cabinetmaking, at least that is what I have been told by other cabinetmakers, especially commercial cabinetmakers (it’s why a lot of them prefer commercial cabinetmaking), it built-in appliances.
One of those built-in appliance cabinets is an oven cabinet. What we as cabinetmakers usually get from the appliance company are specifications with opening widths and heights, but they don’t always tell us how much the face of the appliance overlays the opening. Sometimes the specifications tell us the opening size and the overall size, but then they don’t specify if it overlays the bottom, top, or both, making it more difficult to plan for any and all overlay scenarios.
At cabinotch®, we wanted to deal with this issue, along with several others. First, we have made all the oven cabinet variations so they can be a two piece or stacked unit. The advantages to this is that the cabinet you have to assemble and transport to the job-site is smaller and easier to handle, plus it allows you to exceed our 96″ maximum cabinet height (any cabinet over 96″ tall is invalid since our sheet stock is only 96 1/2″ in length).
We also have left the back off the areas where appliances are so you don’t have to take time measuring and drilling for wires.
So anytime you have an oven cabinet, you simply place the lower portion that holds the appliance(s), then the upper portion above it, then flank it with fillers, other tall cabinetry or applied ends, depending on what is adjacent to it. Obviously this stacking will require applied ends since if you stack the upper and oven cabinet, there will be a seam where those two cabinets meet, although sometimes the location may let you get away without an applied end (wall on one side, and a tall pantry on the other, although I always choose to stack my pantry cabinets as well, but we will save that discussion for another post).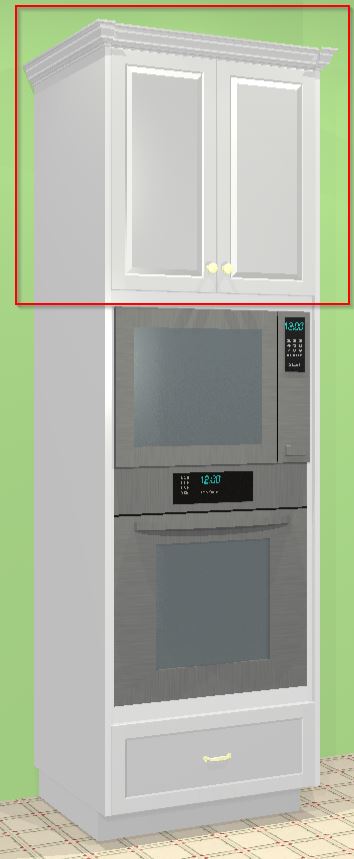
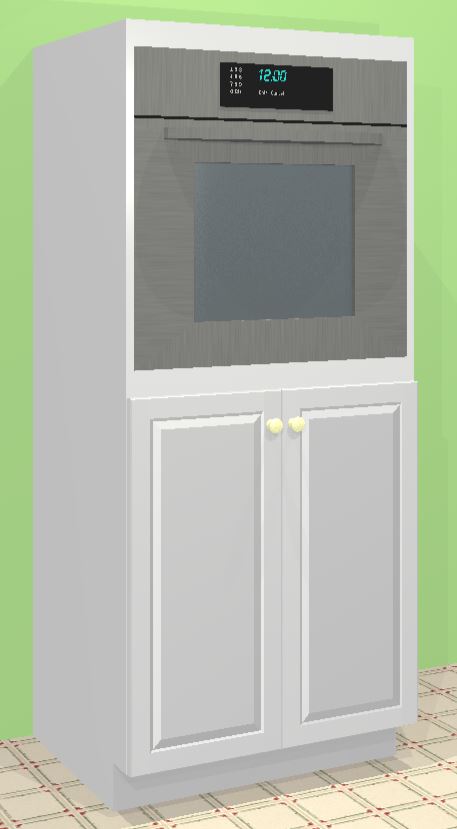
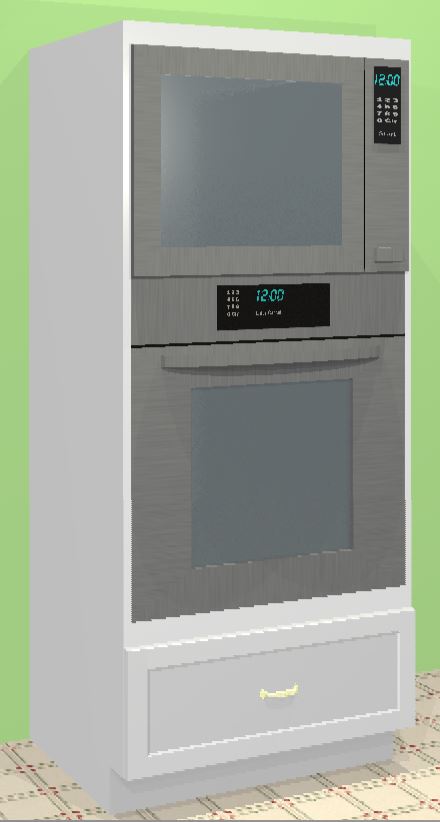
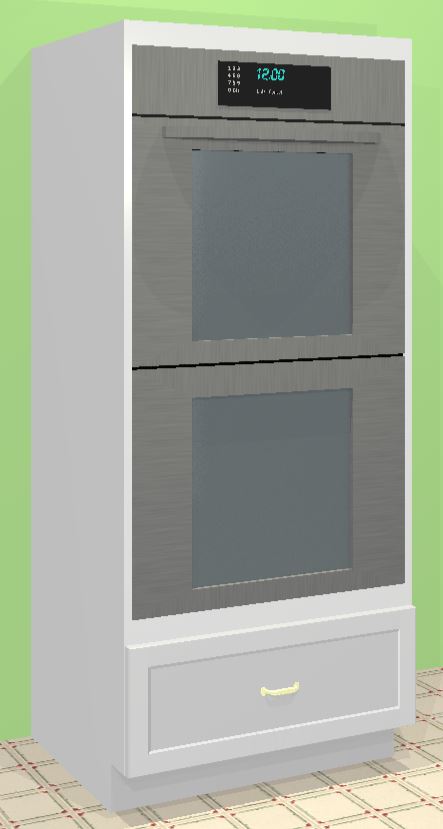
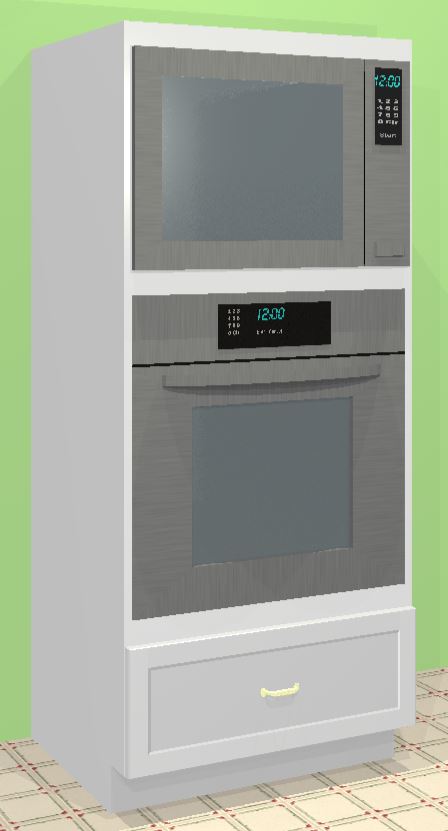
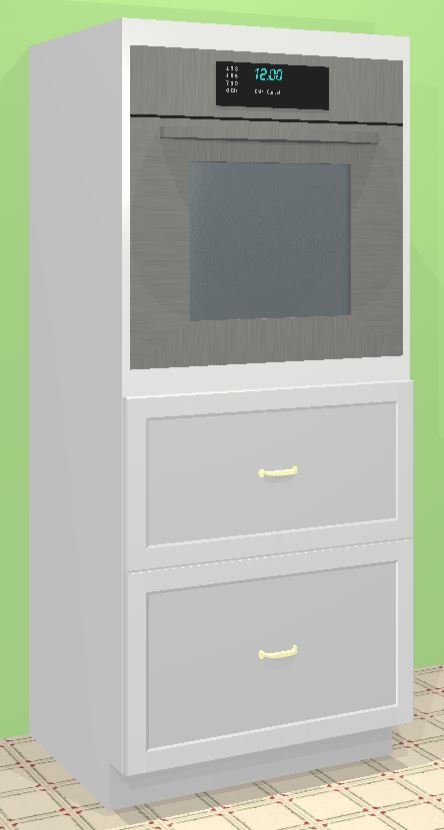
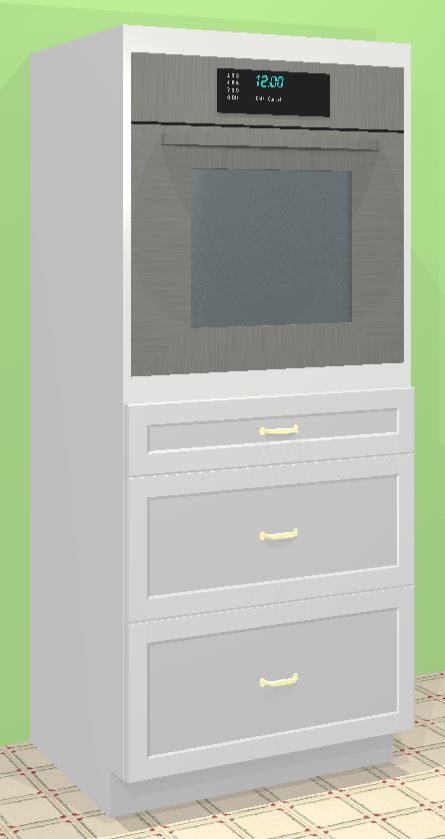
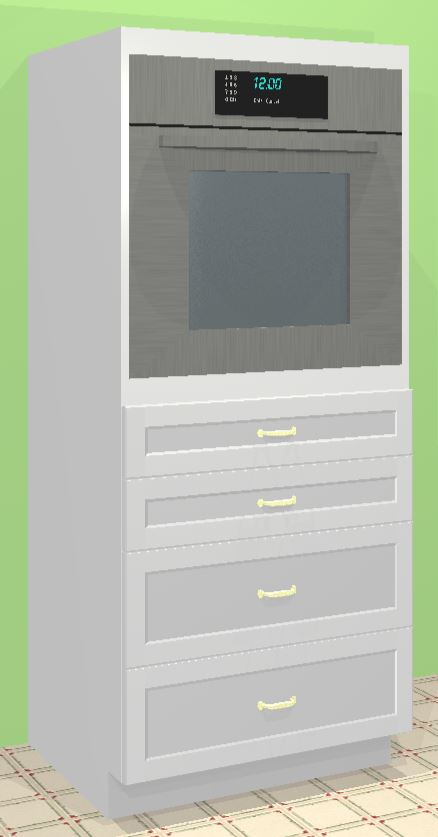
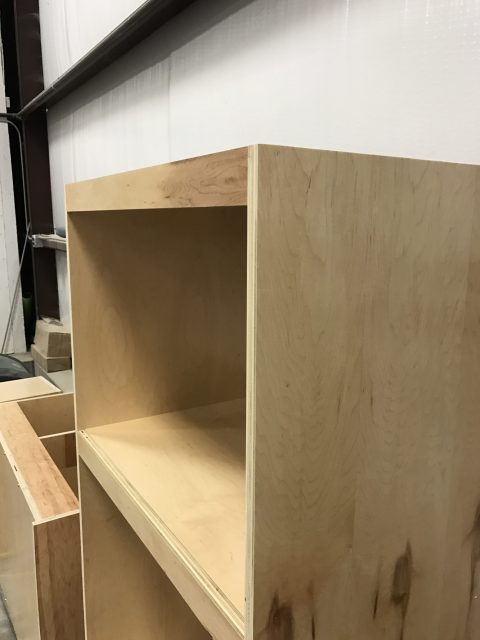
Now lets spend a little time talking about the actual construction of the oven cabinet. Since we need to be able to specify the appliance openings, and we don’t know what the overlay might be above and/or below, we need a buffer zone to leave room for the appliance to land without engaging the other appliance(s) and doors and/or drawers above or below. What you see in the images above are pretty accurate representations of actual microwave and/or oven scenarios, and you see a flat area above, between (if appropriate) and below the appliances. That flat area is what we refer to as a rail, similar to the horizontal rails of a face frame. The rail runs between the two side panels, it is a vertical part, so you are seeing the face, not the edge, and is flush to the front of the cabinet. These rails are what provide a landing zone or area for your appliance overlay, and can be adjusted in size by you, although you do that by editing other fields (rail fields are calculating fields).
Also notice the fields you are entering data into are in the same order as the openings, so you simply start at the top and work your way down. The two most important fields are the appliance openings, and once you have entered those two dimensions, then you can look and see if the rails are of a size you think is appropriate (I try to keep mine around 2″), if they are too big or small based off the default cabinet height, you have two choices, you can decrease or increase the size of the cabinet or the door(s) or drawer(s) below it to get the rails to an appropriate size.
You will also notice that the height field in the image to the left has an up and down arrow just to the left of the field. This up/down arrow feature allows you to move the cabinet height up or down in increments of 32mm (even if you are looking at this with the scale set to inches) so the cabinet stays in system (32mm cabinetry side panels should always be a height that is divisible by 32 and still be an even number). As you add cabinets, they will default to an in system height, and if you make height adjustments with the up/down arrow feature, they will stay in system. If you don’t care to stay in system, then just edit the height. The up/down arrow feature will also be available on door and drawer front heights, so you can also keep the doors and drawer fronts in system (doors and drawer fronts should be divisible by 32mm after you add your reveal, typically 3mm). I’ll write another post soon on why I think you should stay in system, even though the library still works if you go off system.
Now, back to the rails. These rails are cut from material that has a UV coating on the back side, and is veneer on the face (it will be the same specie you chose in your selections to get a Quote). This part is intended to be finished by you, and since this rail engages the side panels, and the appliances won’t cover all of the edgebanded face of the side panels, we edgeband the front edge of all oven cabinets with veneer edgebanding instead of the matching PVC banding you choose, and these edges will need to be finished by you as well. EDIT: We have changed the edgeband on the front of these parts to be whatever you choose, so if you choose PVC, the parts will be edgebanded with PVC, if you choose veneer, then they will be veneer. In other words, we no longer presume to know what you want or need, but let you choose what you want or need.
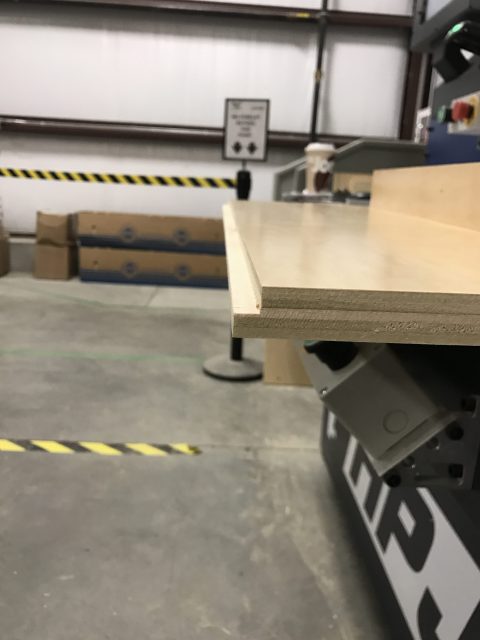
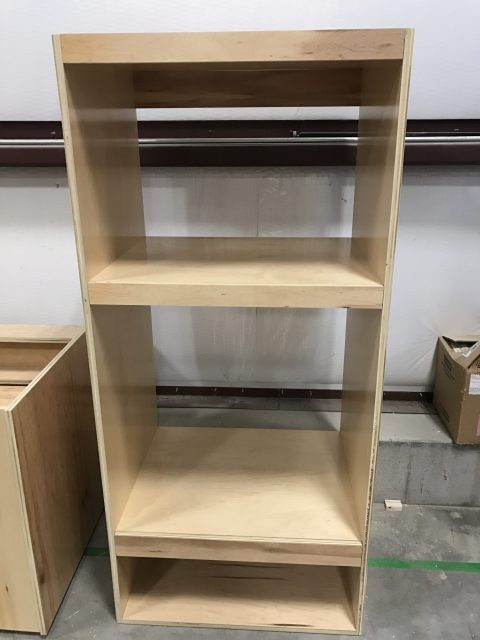
So now let’s talk about how this cabinet goes together, and I’ll be using some photos I took of a prototype we machined to make sure our theories were valid (it’s pretty crude since it was to be destroyed afterwords, so pardon it’s ugliness, we did not edgeband the parts). First, we machine the front edge of the top and any fixed shelves that an appliance will sit on with a rabbet, then we machine the backside of each rail with a dado, and the rails dado slides onto the rabbet. This allows you to glue and pin nail the rail to the top and fixed shelf or shelves if you want to, or you can attach with screws through the side panels if you’re using applied ends, whatever method works best for you. This vertical rail also adds a significant amount of support for the appliance that sits on the shelf.
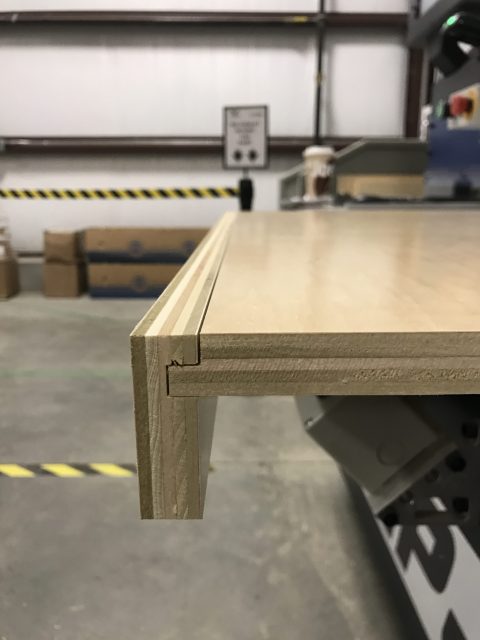
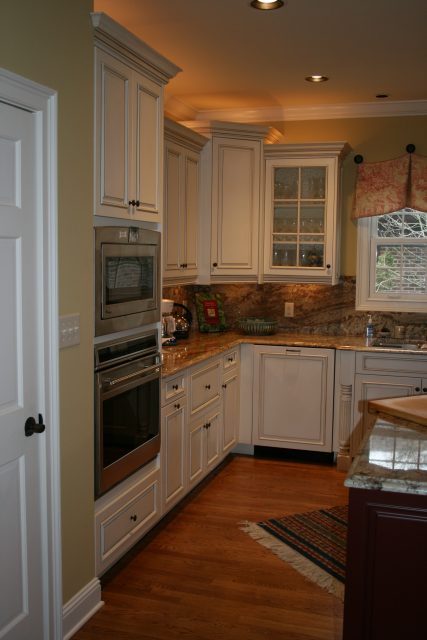
The last photo is of a finished cabinet with a microwave over an oven over a drawer. This was a typical stacked oven box for us, with the pair door cabinet above being a separate cabinet. This particular oven cabinet would have had an 1- 1/2″ filler on the left where it engaged the wall, and an applied end on the right.
Well that pretty well covers our super cool oven cabinet, but feel free to ask any questions you might have below, and to make sure you won’t miss any of our cabinotch® posts, enter your email address in the Subscribe field on the right, and each time we add to this discussion, you will automatically be notified. Oh, and you won’t hurt our feelings if, depending on where you are seeing this, you Share, Like, Plus or Re-tweet it.
Thanks for the helpful tips.
My pleasure Randon.
Bobbo, I’m going to find this an extremely useful cabinet IF I can get the job’s default PVC edgebanding on it.
Otherwise it has everything I need in an oven cabinet. 🙂
Getting a cabinet that I have to finish the edgebanding on don’t make no sense for me.
I’m using my door vendors pre-finished filler stock to replace the dadoed rails.
My goal is to move cases out the door without a side trip to the spray booth.
Every wall oven I’ve encountered leaves between a 2mm and 4mm on a 30″ – 762mm wide box, so there’s little or no cabinet face to see.
I’m always applying end panels to exposed ends as well, so prefinished inside and out w/ PVC edgebanding saves me a bunch of work.
Mark,
Thanks for the well articulated feedback, and I agree with you completely. Since this article was written, we have changed our processes. We no longer automatically presume the edgeband on any cabinet component will be veneer, even if it is raw on one face. Our new process is that all faces are whatever you choose for your edgeband selection for all cabinet components, and if someone needs some parts to be different, they can do that on a cabinet by cabinet basis.
So, the cabinet should work exactly like you want it to be based on this new process, and for those that feel the need to have the edges edgebanded with veneer edgeband to be finished, they can make that happen as well (I think that is called “we can have our cake and eat it too”).
Excellent !